

1. How a flow wrapper works?
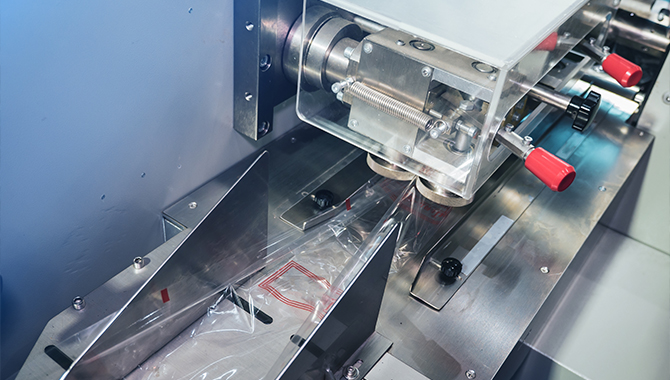
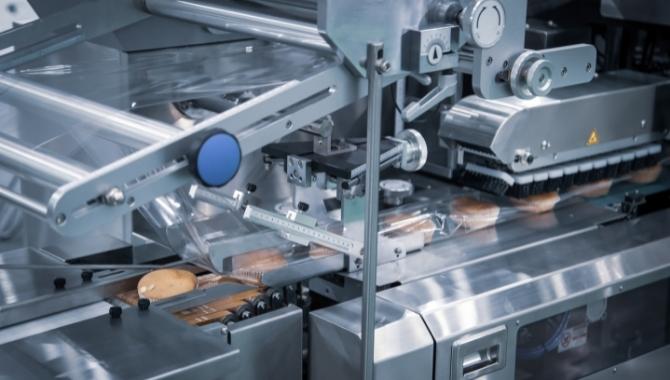
Before giving an explanation, let’s take a look at the flow wrapper principle. Film carriers (at least one film carrier, double film carriers are available with quick-change) are used in flow packaging. The feed conveyor, the bag former, the fin seal unit (bottom seal), and the end seal unit (end sealing system) are also used.
The product is fed into the film tube formed by the bag making machine by the feeding conveyor, and then is bottom-sealed by the fin sealing device, and the end-sealing device is used for single bag cutting. Refer to the figure below. The whole process is continuous and fast. Widely used in food packaging and other solid shape products in bags.
2. Steps to operate flow wrapping machine
Let us take the Jochamp flow wrapping machine as an example for reference.
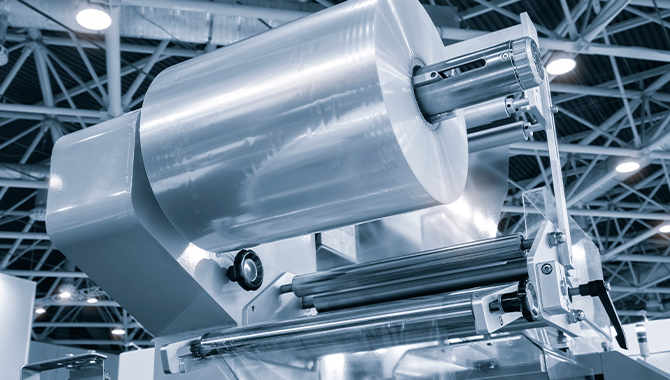
Step 1: Load the film roll of the correct size and fasten it on the carrier.
1) Choose the film with the right width according to the product size. Don’t know how to get the film width from the product size? Check out the help of this article “How to calculate the bag size and film width”
2) Load the film and rotate the fixed-grip wheel clockwise.
Technical tips:
- The wheels should be fastened, and the tapered part of the inner and outer rollers should fully support the inner film roller.
- The centre point of the film should be at the same position as the centre point of the film carrier.
In this way, the film roll can be held tightly by the carrier and cannot run inward or outward during operation, so that the eye trace sensor of the machine can successfully record the film trace.
Step 2: Pass the film through the roller correctly, refer to the figure below.
Incorrect threading of the film will cause the film to wrinkle during operation.
Step 3: Adjust the width, height and angle position of the bag.
The adjustment before the bag is very important for the production of the film tube and the smooth operation of the film.
- The width of the bag front machine should be adjusted according to the width of the product, and the gap is small, which is convenient for the product to pass.
- Generally, the height of the bag front does not need to be adjusted. It is only necessary to adjust when the sealing area of the bag fin is too large or the membrane is broken during the operation.
- The bagging machine is not installed horizontally but installed at an angle. It is recommended to form an angle of 15-20° with the upper left position so that the film can be fed smoothly from the film roll to the bagging machine, and it is also conducive to forming an L-shaped feeding effect. Step 4.
Step 4: Adjust the position of the film roll rod.
Film roll rods are adjustable, the purpose is to generate tension between the roll of film and the bag former, thus forming an L shape (film tension effect).
For small-width films, around 150mm, the position of the rolling bar is shown in the figure below.
For large-width films, about 300mm, the position of the rolling bar is shown in the figure below.
However, these positions are not standard, and the only purpose is to create a strong tension between the film roll and the bag forming machine.
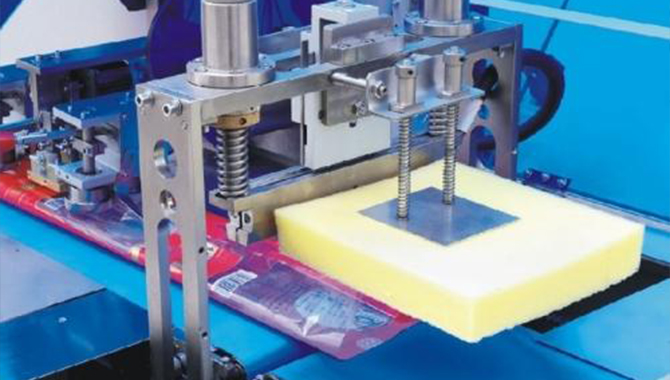
Step 5: Move the product guide plate forward.
The product guide plate should be moved as far as possible to the film pulling wheel so that the product can enter the film tube with side protection.
Step 6: Use different size bags to pack the front plate.
Since the bag-forming machine is adjustable and can pack products of different sizes, the corresponding bag-forming board needs to be changed accordingly. Why? The reason is shown in step 4, the purpose is to make the film have tension during the feeding process.
For products with a small width of about 20-50mm, the front panel of the bag should be short.
For packaging products with large width of 50mm or more, the bag front plate should be a long plate, and the bag front plate should be moved to the side of the long conveyor to make the bag forming process more smooth. (The bag making machine has a large transition area and can form a tubular film)
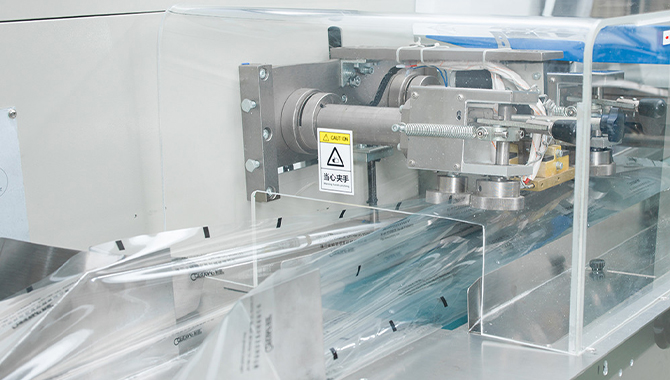
Step 7: Pass the film through the fin sealing unit and the end sealing unit, and run the machine.
Pass the membrane through the fin sealing unit and the end sealing unit, and run the machine to check the running status of the membrane. If it does not run smoothly, please check where there are wrinkles or blockages, and find solutions according to the relevant operating steps.
Only when the machine can successfully complete the empty bag, can the product be placed on the conveyor belt of the packaging machine for test packaging.
Step 8: set the sealing temperature
The required temperature can be set, and different temperatures can be set according to the film material, thickness and packaging speed. Generally, PP film or OPP/CPP film is used, the thickness is 50 microns, the speed is 60 bags/min, the fin sealing temperature is set to 140°C, and the end sealing temperature is set to 140°C. The packaging speed is fast and requires a high set temperature.
Step 9: Set the tracking switch function.
Tracking means that the machine cuts the bag according to the marks on the film (the marks are usually printed in black).
Trajectory cutting means that the machine cuts the bag according to the set length.
Tracking function setting method:
- Set the machine screen to display tracking instead of tracking off.
- Measure the marking distance of the film and enter it into the screen bag length menu.
- Move the eye print calibration sensor to the film mark. When a film mark passes, the light of the sensor should flash once. If it does not pass, adjust the sensitivity of the sensor.
- Once the tracking is complete, the bag will always be cut in the same place. (Error +/- 2mm)
- After stopping, click the button on the right or the left of the screen to move the film position, click the track button to confirm the position and the machine will make the bag according to the new position.
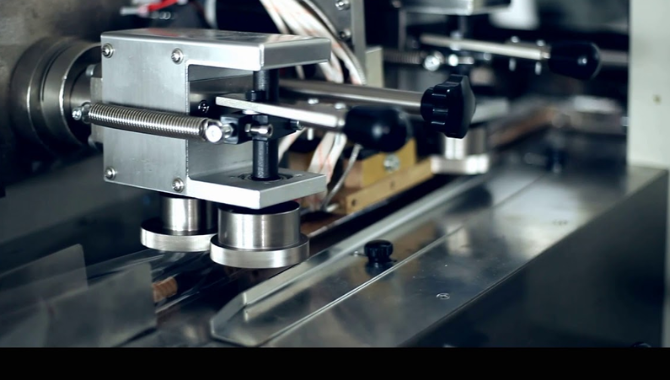
Step 10: Adjust the position of the film pulling wheel if necessary.
The position of the film pulling wheel can be adjusted by swinging left and right. The standard position is not horizontal, but slightly lower left about 10 degrees. Therefore, the film can be pulled down during operation without bursting, but the lower left angle cannot be set too large to avoid bursting.
If the position of the film pulling wheel is horizontal, it will cause the fin seal to eating too much film.
Note: Under normal circumstances, the position of the pull-down film wheel does not need to be adjusted.
Step 11: Adjust the iron plate to close the gap.
Due to different types of membranes and different thicknesses of membranes, the closed gap of the iron plate needs to be adjusted so that the membrane can pass smoothly and be heated well, but since the membrane must have a temperature to seal, the gap cannot be adjusted too much.
If the film is blocked in front of the iron plate, it means that the closed gap of the iron plate is too narrow and needs to be adjusted.
Step 12: Adjust the rotating speed of the sealing film wheel.
The speed between the film pulling wheel and the film sealing wheel is adjustable, and the two tapered parts driving the film sealing wheel are connected by a timing belt.
The key points of the film sealing wheel speed regulation technology.
- For the spot sealing wheel, while adjusting the speed, it is necessary to ensure that the film is not blocked.
- For the ring seal wheel, the speed should be adjusted quickly to make the seal line more straight.
Step 13: End sealing speed adjustment.
The adjustment of the end sealing speed, also called the adjustment of the cutter speed, refers to the film feeding speed, not the packaging speed. There is a speed adjustment handwheel to set it. If the cutter speed is too slow, the film will be jammed before the claws. If the cutter speed is too fast, the film will be pulled out by the cutter, resulting in insufficient sealing pressure and the bag may be broken.
Technical points: When the bag length changes, the end sealing speed should be adjusted accordingly. For some servo-type machine tools, this step is automatically completed by the machine.
Step 14: Pick up the product and make a test package.
After the machine empty bag is successfully completed, it is time for the packaging test with the actual product. We know that the film size is based on the product. Don’t know how to calculate the film size from the product size? You can check this article “How to calculate the bag size and film width”.
- Enter the bag length. (The length of the bag is calculated according to the length and width of the product, please refer to the article linked above)
- Put the product on the feeding conveyor and run the machine to check the position of the product inside the film tube.
- Use the handwheel to change the position of the push wheel and lock it after setting.
- Run the machine with product samples, check the product position in the film tube again, and constantly adjust the position of the pusher until the product is sent to the correct position.
Technical points: After adjusting the position of the pusher, remember to lock it. Otherwise, the position will always be changed during the operation.
Step 15: Adjust the height of the end seal system.
In order to ensure a good sealing effect, the sealing jaw-closing line (upper jaw and lower jaw-closing line) should be located in the middle of the product height.
Height adjustment method of end sealing system:
Loosen the 4 screws around the side plate of the sealing jaw, and use a wrench to adjust the height of the end sealing system.
Step 16: Troubleshooting of abnormal end seal speed.
After cutting a hard product, the position of the upper and lower gears may change, causing the end seal system to rotate abnormally.
For flow wrappers with a rotating end seal system, we know that the slowest point in the closed position of the upper and lower jaws so that the bag has sufficient sealing pressure. If the position of the upper and lower jaw gear changes, the slowest point is not the closed position of the upper and lower jaws, which may cause the upper and lower jaws to pull the bag. Even if you have adjusted the sealing speed to the slowest position with the handwheel, please refer to step 13.